

Floor-to-ceiling height is one of the most expensive resources in any office building or retrofit. Low-profile raised access floors solve cable distribution within 27 to 150 mm of finished height and give every saved centimeter back to the space. This guide covers the height spectrum, panel materials, installation, applications, and how the product differs across regional markets, and closes with the mistakes and questions that come up on nearly every project.
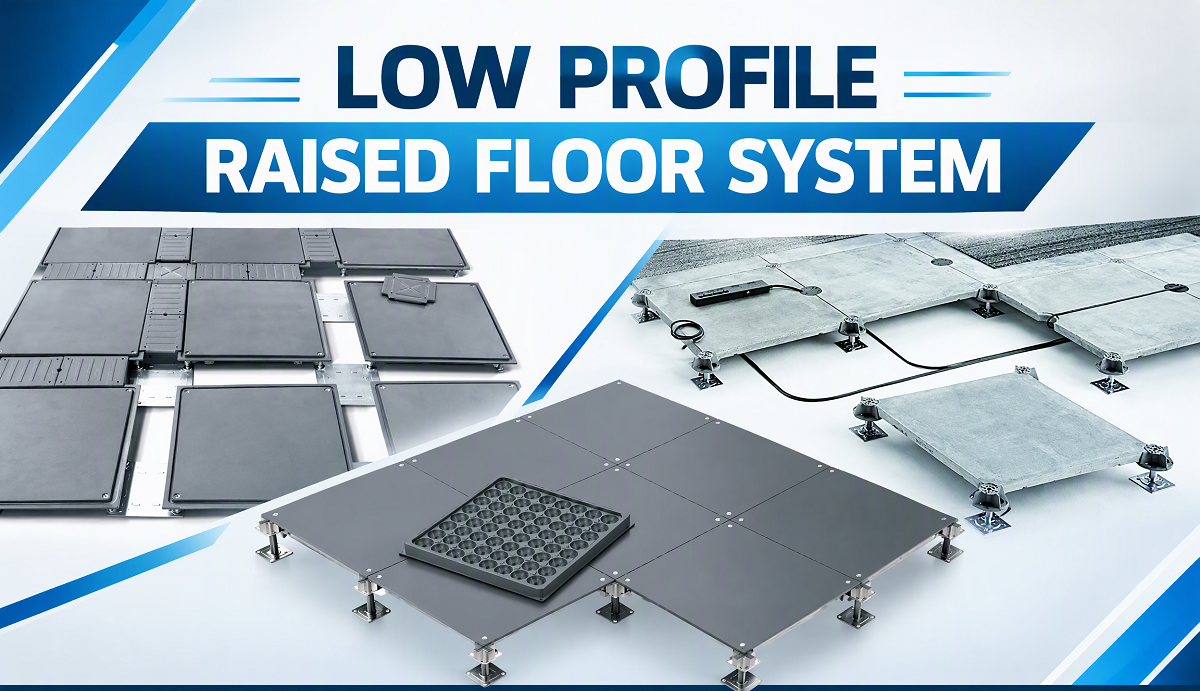
What It Is Low Profile Raised Floor System & What It Is Not
Raised access floors are familiar: adjustable pedestals carry removable panels, and cables run underneath. In server rooms that system sits 300 to 600 mm above the slab, and the cavity works double duty as cable space and pressurized air plenum. Before deciding anything about height or material, it helps to be clear that a low-profile floor is not a shrunken version of that system.
A low-profile access floor is a different animal: finished floor heights (FFH) below roughly 150 mm, with most products between 27 and 100 mm.
The logic changes completely. Conventional floors rely on a deep open cavity; low-profile systems rely on integrated cable trenches. Grooves 90 to 110 mm wide are built into the panel edges or the main panels themselves, power and data run in separated channels, and any trench cap lifts by hand for maintenance. No panels need to come up to re-route a cable.
That trade defines the category: underfloor air distribution is sacrificed in exchange for ceiling height. In office buildings from the 1980s and earlier, where no height was ever reserved for an access floor, it is often the only workable option. In new builds, 50 mm of floor replaces 300 mm and the ceiling rises by a quarter of a meter.
Working Definition: a low-profile access floor is a system with FFH at or below 150 mm, trench-based cable management, and no underfloor air function. Its value is maximum cable flexibility at minimum vertical cost.
Low Profile Raised Floor Height
With the definition settled, the first real decision is vertical: how much height are you actually giving up, and what does each millimeter band buy you? Low profile is not one product. From 27 to 150 mm, each band supports different cable capacity and different use:
| Height band | Cable capacity | Typical use | Watch out for |
|---|---|---|---|
| 27 to 40 mm (1.06 to 1.57 in.) | 1 to 2 flat cable layers | showrooms, retail, temporary spaces | only prefab modular systems achieve this; pedestals will not |
| 50 to 60 mm (2 to 2.36 in.) | about 40 CAT6 runs per 600 mm module | standard offices, retrofits | the accepted practical minimum; door thresholds need detailing |
| 80 to 100 mm (3.1 to 4 in.) | power and data separated, 2 in. raceways fit | dense open-plan offices | best value band; the default for new fit-outs |
| 100 to 150 mm (4 to 6 in.) | small raceways, ducts pass locally | AV-heavy classrooms, smart offices | closer pedestal spacing; check lateral stability |
Case: Retrofit Where Height Was the Whole Decision
A financial-services tenant took two floors of a 1986 office tower: 2.65 m slab to underside of ceiling, no access floor ever planned, and a full data fit-out for 180 workstations. A conventional 300 mm floor would have pushed the ceiling down to an oppressive 2.35 m and triggered sprinkler and partition rework.
The chosen system sat at 48 mm. The trench grid absorbed roughly 2,900 cable runs, the ceiling kept its original line, and the entire cable layer stayed invisible. In retrofits like this, the height band is not a preference; it is the project.
Low Profile Panel Materials and Finishes
Height determines how much the floor can hold; the core and the finish determine how long it holds up, and how it feels doing it. Low-profile panels are thin, 25 to 35 mm, so the core choice drives load capacity, fire behavior, and weight:
| Core | Construction | Strengths | Limitations | Best for |
|---|---|---|---|---|
| Steel, cement filled (the market default) | 0.6 to 0.8 mm top and 0.5 to 0.6 mm bottom steel sheets welded into a shell, foamed cement infill | high load, non-combustible, moisture tolerant, 26 to 40 lb per panel, installs without heavy equipment | heavier; cut edges need touch-up | most office projects |
| Steel, unfilled | all-steel shell, no cement | 30 to 50% lighter, 100% recyclable, reusable after relocation | slightly lower concentrated load at equal thickness | LEED projects, leased spaces expecting churn |
| Calcium sulphate | gypsum core, steel encapsulation on all faces | best creep resistance, dense underfoot feel, high environmental ratings | heavy; cut edges must be epoxy sealed or the core degrades with moisture | projects where flatness and long-term durability dominate |
| Trench-type steel | floor tiles plus edge caps and trench caps, clipped together | heights down to 35 mm; power and data isolated in separated channels | trench caps are the weakest walking point; specify heavy-duty versions | ultra-low heights, power/data separation requirements |
| Wood-core / chipboard | high-density particleboard faced with steel or foil | comfortable underfoot, low cost | poor moisture behavior, declining market share | dry, light-duty offices |
Finish – Second Decision
The finish is not decoration only; it determines how easily the space changes later:
- Carpet tile is the default. It replaces locally, adds acoustic benefit, and magnetic versions let outlet positions move with the furniture plan.
- Vinyl or rubber sheet and tile suit healthcare and education, where seamless, cleanable surfaces matter.
- HPL or ceramic on exposed panels for zones walked by carts or without finish, such as riser rooms.
- Bare powder-coated steel for budget retrofits or as a hidden substrate under carpet.
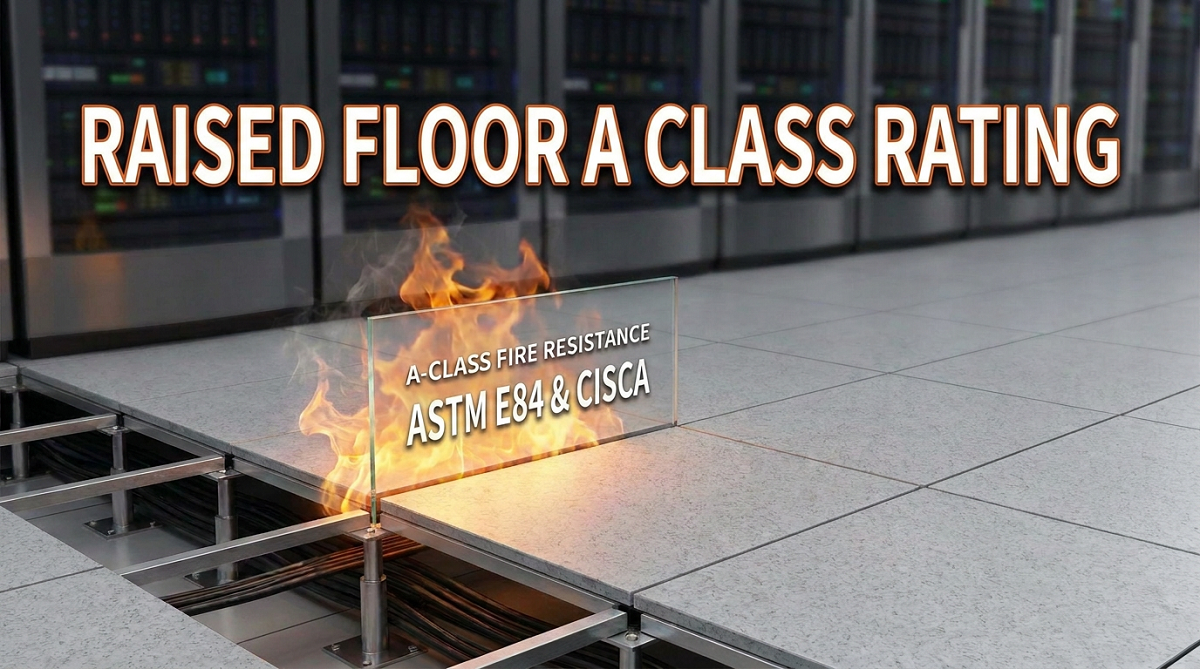
The fire-rating trap: a steel panel is non-combustible, but the assembled floor is rated with its finish included. In code-driven projects the carpet tile and vinyl must carry their own class certificates (Class B1 / Euroclass C-s1 or better where required), and the specification should list panel and finish ratings separately, or the inspector will test the composite.
Low Profile Raised Access Floor Components: Pedestals, Trenches, Outlets
Material sets the panel, but what turns panels into a working floor is the hardware underneath and the trench system running through it. Because there is no height to hide hardware in, every function gets compressed into the panel itself:
Pedestals are threaded posts with adjustment range they never get to use here. Low-profile systems use either built-in corner feet riveted to each panel (self-standing panels, no domino collapse under lateral shock) or ultra-short adjustable pedestals with 1 to 2 in. of travel. Galvanized hardware is the floor of acceptability; painted steel rusts quickly at these heights and is a cost-cut signal.
🔹Trenches
Systems such as Netfloor Camass run 90 to 110 mm (3.5 to 4.3 in.) wide trenches across the entire floor in a grid; every cap lifts by hand or with a screwdriver. Trench-type products use the gap between tiles as the channel, with power and data occupying separated halves.
🔹Outlets
Three routes: swap a trench cap for an exit cap and bring cable straight up; cut the panel for a floor box; or land cables in a service module under the desk. Align outlet positions with the furniture plan before ordering panels. Outlets are the most common rework item in this category.
Low Profile Raised Floor Applications
With the anatomy clear, the practical question is where this product actually earns its keep. The same system that solves a retrofit in Chicago solves a churn problem in a coworking space, for different reasons. The table below matches building types to setups:
| Application | Recommended setup | Why |
|---|---|---|
| New office / commercial fit-out | 600 x 600 mm steel panels, 80 to 100 mm, carpet tile | best balance of capacity, cost, and ceiling height |
| Office retrofit | trench-type or self-standing system, 40 to 60 mm | older buildings never reserved access-floor height; FFH is a hard constraint |
| Open-plan and coworking | grid trench system with exit caps | workstations churn constantly; outlets must move too |
| Education | 50 to 75 mm, vinyl finish | technology refresh cycles, reusable modules |
| Retail and showrooms | 27 to 50 mm prefab modules | layouts change seasonally; the floor must disappear |
| Healthcare | 60 to 100 mm, seamless rubber or vinyl | equipment cabling grows and moves, hygiene is critical |
| Security rooms, IDF closets, control rooms | not low profile; use an ESD raised floor | these rooms follow data-center rules and the two systems must not be mixed |
Case: Retail, Where the Floor Changes With the Season
A European retail chain refit a 3,800 m² flagship store on a 45 mm prefab module system with integrated outlet points. Four times a year, the merchandising team repositions display plinths and till points overnight. Power and data follow by lifting exit caps and re-patching in the trench, with no trade crew and no damage to the floor.
The store was refit twice before the system paid for itself against the alternative, which was cutting and patching the slab for every layout change.
Low Profile Raised Access Floor Regional Markets
Applications show what the product does; geography changes what the product is called, how it is tested, and what buyers expect to see in a datasheet. Anyone procuring across borders should have this table on the wall:
| Market | Dominant form | Typical heights | Standards | Market character |
|---|---|---|---|---|
| China (mainland) | steel OA network floor, trench-type network floor | 20 to 100 mm, mainstream 50 to 80 | GB/T 36340 (ESD types), GB 8624 (fire), JGJ/T 492 (application code) | largest output and lowest prices (roughly $12 to $18 per m²); “OA network floor” is the local term and is clearly distinguished from ESD flooring |
| Japan | OA floor, double floor (二重床) | 40 to 300 mm, finely graded | JIS durability and load standards | severe ceiling-height pressure drove mature low-profile lines; strictest seismic, comfort, and flatness expectations |
| Taiwan, China / Asia-Pacific | low-profile cable management systems (Netfloor lineage) | 40 to 100 mm | mixed British and American practice | home ground of systems like Camass: 40 mm start, set-screw height locking, self-standing panels |
| Europe | prefab ultra-thin modules and short-pedestal systems | 27 to 75 mm (Nextfloor) | EN 12825 (specify the full four-part rating, e.g. 3/A/3/2), CE marking | Nordic turnkey prefab delivery, 50-year service life claims, strong recycling logic; retrofit constraints are common |
| North America | low-profile cable management access floors | 40 to 100 mm | CISCA recommended practice, ASTM fire and load testing, NFPA 70 | the retrofit market is the story: pre-1980s offices rarely reserved plenum height; LEED and recyclability carry weight |
Three Practical Notes for Cross-border Projects:
✅Terminology First
A supplier saying “OA floor” (China) is describing what North American buyers call a low-profile cable management access floor. Searching “OA raised floor” abroad returns nothing useful, and spec sections will not match.
✅Load Language Differs
Chinese datasheets quote distributed load in kg/m² and concentrated load in N. British practice (PSA MOB PF2) states ultimate load with a 3x safety factor; EN 12825 requires the full four-part notation (load class / deflection class / safety factor / tolerance, e.g. 3/A/3/2). The same panel needs a translated load story, not just a translated page.
✅Fire Language Differs
China GB 8624 Class A maps to Euroclass A1 and to non-combustible under ASTM E136. Writing “Class A fire rated” without citing the test method will stall customs reviews and project approvals alike.
Where Low-Profile Ends and Server-Room Floor Begins
Regional differences matter most at the boundary with the other raised-floor category, because that is where orders go wrong: a product gets extended into a room whose rules it does not meet. Projects go wrong here more often than anywhere else. Low-profile (office-grade) products and ESD raised floors are two systems, not two sizes of one system:
| Aspect | Low-profile (office-grade) | ESD raised floor |
|---|---|---|
| Finished height | 27 to 150 mm | 250 to 600 mm (up to 1200 mm for liquid-cooling halls) |
| Core function | trench cable management, flexible outlets | open cavity cabling plus underfloor air plenum |
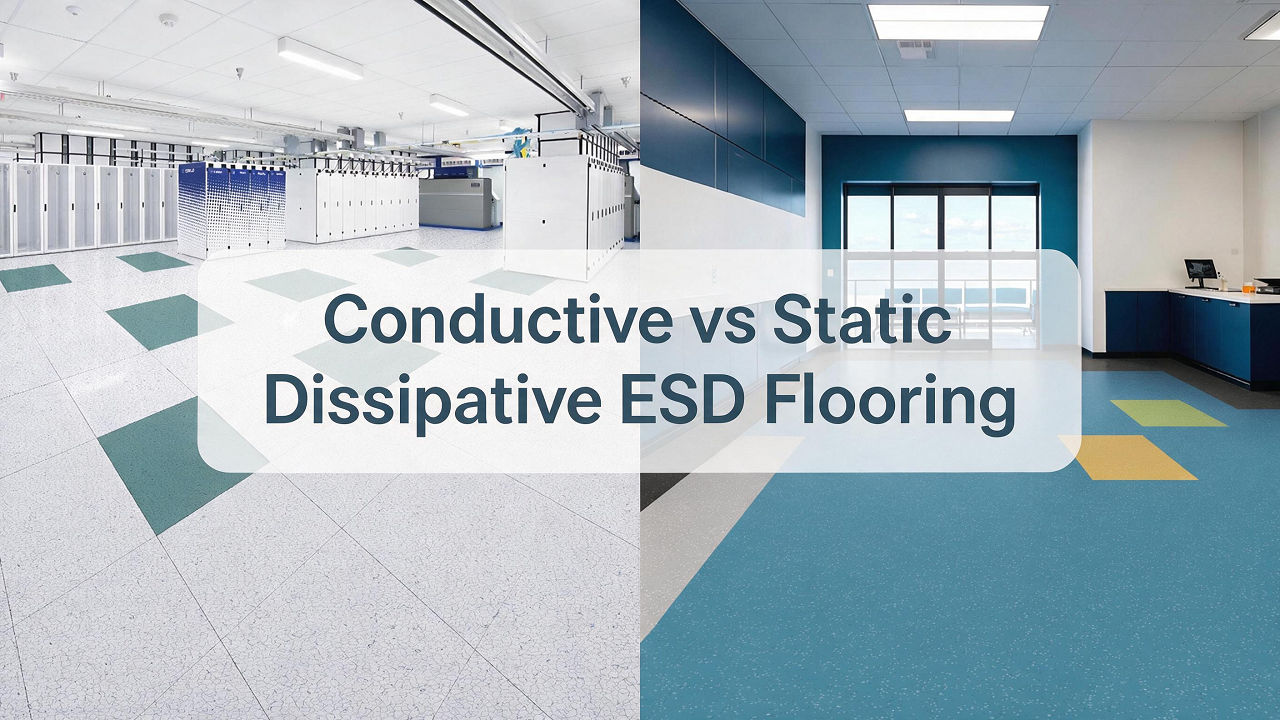
| ESD performance | usually not required (optional) | the defining metric, 2.5 x 10⁶ to 10⁹ Ω |
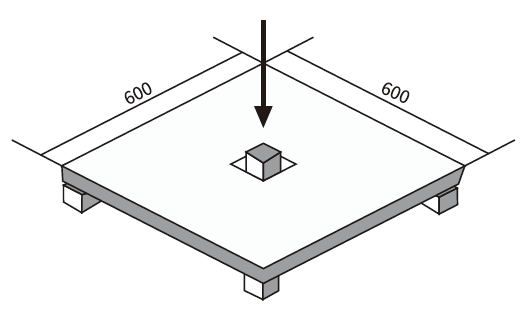
| Concentrated load | 700 to 2000 N (157 to 450 lbf), office grade | 3000 N and up, engineered per rack |
| Grounding | generally none | copper grid, equipotential bonding, resistance limits per code |
| Rooms | open offices, classrooms, retail, healthcare | data halls, control rooms, IDF rooms, cleanrooms |
The classic mistake to avoid: fire command rooms, IDF closets, and CCTV control rooms inside an office building must use ESD raised floors. Do not extend the office-grade product into them just because the whole floor is being fitted out at once. The two systems coexist on the same project routinely; the drawings and budget should list them separately.
When & How To Select Low-Profile Raised Floor
Knowing the categories and the markets, selection still comes down to a disciplined sequence. Skipping a step rarely shows up until commissioning or, worse, a year into occupancy. Work through them in order:
- Step 1: Confirm you do not need underfloor air – If the HVAC concept involves floor supply air, low profile is out and the fallback is a conventional 300 mm-plus system. This is the strongest veto in the whole process.
- Step 2: Count cables, add 30%, set the height – Count power and data runs across each 600 mm module. Rule of thumb: 50 to 60 mm holds about 40 CAT6-class flat runs; dense offices go straight to 80 to 100 mm. Never below 35 mm (1.4 in.).
- Step 3: Size for the heaviest moving load – Not people; carts and laser printers. Standard offices need at least 450 lbf (2000 N) concentrated load; printer and filing zones take heavy-duty panels with closer pedestals. In trench-type systems the trench cap is the worst-case walking point and must be checked separately from the panel.
- Step 4: Check pedestal stability at low height – The lower the floor, the shorter the anti-overturning lever arm. Manufacturer application matrices openly mark the 50 to 100 mm band as unsuitable for refurbishment on uneven subfloors: retrofits either use self-standing panels or level the slab first.
- Step 5: Resolve transitions – Even 50 mm creates a step at doors, lobbies, and bathrooms. Options include stone thresholds, local ramps (accessible routes at 1:20 or gentler), or full leveling. Detail this in design development, not on site.
- Step 6: lock the subfloor conditions – Sound, flat slab (within 2 mm per 2 m), with densification where the surface is dusty. Ironically, short pedestals forgive less than tall ones; a bad subfloor guarantees squeaks and rocking panels.
How To Install Low-Profile Raised Access Floor?
A correct specification can still be undone by a careless install. Low-profile floors are fast to install, which is exactly why crews used to conventional raised floors get complacent: the tolerances are tighter, there is no cavity to hide an uneven slab in, and mistakes show up as rocking panels within the first week. The sequence below reflects how experienced crews run a 50 to 60 mm trench-type or modular system.
Before anything arrives
Verify the slab. Check flatness (2 mm per 2 m), moisture, and dusting. Densify or self-level where needed. The floor cannot be flatter than its base.
Set the datum from the highest point. Find the highest spot on the slab and set the finished floor height from it, not from the door. Every height on the drawings inherits this decision.
Mark the grid and the services. Chalk out the module grid, trench runs, and outlet positions from the furniture plan. Confirm on site that every exit cap lands where a workstation actually will be.
Installation Sequence
- 1. Reference lines and starting point. Start from the center of the room and work outward, keeping the trench grid parallel to the main cable direction. Perimeter panels take the cuts; never the reverse.
- 2. First rows set the quality of the whole floor. Dry-lay the first two rows, check the grid with a string line in both directions, and confirm the trench channels align across panel joints before any fixing begins.
- 3. Lay panels outward. Place panels onto pedestals or connect self-standing modules. Never slide a panel across a pedestal head on a pedestal system; lift and lower. Sliding displaces the leveling setting.
- 4. Level as you go. On adjustable pedestals, re-check level every few square meters with a straightedge, not just at the start.
- 5. Cut the perimeter. Measure each perimeter panel individually. Cut with a fine-tooth blade, support the cut edge, and epoxy-seal any calcium sulphate core immediately. A cut gypsum edge left overnight in humid weather is enough to start degradation.
- 6. Install trench caps and exit caps. Standard caps in circulation areas, exit caps at outlet positions per the furniture plan. Confirm each cap sits flush; a proud cap becomes a trip point and a noise complaint.
- 7. Check height and hollowness. Spot-check FFH against the datum and walk the floor, especially the trench lines, listening for movement. Fix every loose point now; it only gets harder after the finish goes down.
- 8. Transitions and thresholds. Install stone or metal trims at doors and material changes. Accessible routes get ramps at 1:20 or gentler.
- 9. Finish the floor. Carpet tile, vinyl, or rubber goes down on top of the system, using adhesives or magnetic methods approved for the panel surface.
How fast does it go? An experienced two-person crew typically lays 150 to 250 m² per day on a 50 to 60 mm trench system, excluding the finish. Prefab modular systems are faster still: a single room can be converted in a day, which is precisely what makes them attractive for phased, occupied-building work.
Case: Call-center Fit-out on a Live Floor
A 1,150 m² call-center fit-out in an occupied building used a 60 mm trench system with carpet tile finish. The crew completed the raised floor in nine working days, including perimeter cuts and two small floor boxes, then laid carpet over four more. Business downstairs never stopped; noise was the only constraint, so panel cutting happened in a dedicated cut station in the loading area rather than in the work zone.
The lesson for client-facing teams: installation speed is real, but it depends on the crew following the sequence, not improvising it.
Mistakes to Avoid when Choosing and Installing a Low-Profile Raised Floor
Most problems in this category were bought, not built: a decision made on paper before a single panel arrived, or a shortcut taken in the last two days of the install. The seven mistakes below account for the overwhelming majority of failures we see in the field, in roughly the order projects encounter them.
1. Using an OA floor as an ESD floor. Bare panels carry no static-dissipative performance; putting them in an IDF closet is a code violation. The reverse, buying ESD floor for open office, is money wasted.
2. Sizing the height with zero headroom. Cables fit on day one; two network switches later, the trench is full. A 30% reserve is not a luxury, it is the product.
3. Outlets added after the fact. Panel cutouts and floor boxes are nearly impossible to relocate. Furniture plan first, outlet caps second, order last.
4. Saving money on painted pedestals. Low-profile pedestals sit near slab moisture and take constant foot traffic; painted hardware rusts and settles within a few years. Galvanizing is non-negotiable.
5. Ignoring how trench caps feel underfoot. On trench-type systems a cheap cap produces a perceptible ridge that grows worse with wear. Walk the sample, including the trench line, before approving it.
6. Setting levels from the wrong reference. Crews that set the finished height from the door instead of the slab high point discover, three rows in, that panels will not sit level near the core wall. Correcting mid-install costs a day; correcting after the finish costs the finish.
7. Leaving perimeter cuts and cap seats unfinished. Unsealed cut edges, unfixed perimeter panels, and proud trench caps are small items that generate most of the snag list. Budget a full day at the end of the install purely for these details and the handover gets dramatically quieter.
More FAQs about low-profile raised floors
Even with the process under control, the same handful of questions comes up on almost every project, from buyers, facility managers, and sometimes the install crew itself. These are the ones worth answering before the contract is signed.
How low can a low-profile access floor actually go?
Prefab modular systems start around 27 mm (1.06 in.), enough for one or two flat cable layers. Below 35 mm there is no realistic maintenance access, so 35 mm is the practical floor for anything but the lightest retail or exhibition use.
Can it be installed over an existing floor covering?
Sometimes. Old vinyl or ceramic in sound condition can work as a base if it is well bonded and level, and it saves removal cost. Loose tile, cushion-backed carpet, and anything with an unstable surface must come out: short pedestals magnify every defect underneath them.
Can I combine it with underfloor heating?
Yes, with a caveat. Systems that sit directly on the slab with insulating panels are compatible with most hydronic or electric systems. With pedestal-based systems, check the manufacturer’s detail for thermal bridging and keep services and heating circuits separated in the trench plan.
How much weight can it carry?
Office-grade systems typically handle 157 to 450 lbf (700 to 2000 N) concentrated load, which covers people, furniture, and office equipment. Heavy printers, filing systems, and anything on casters in a fixed location need heavy-duty panels with closer pedestals, and the trench caps must be checked separately from the panels.
Does it work as an air plenum for underfloor air conditioning?
No. Trenches, caps, and short pedestals are not designed to seal or resist air pressure. If the HVAC design needs underfloor supply air, a conventional raised floor of 300 mm or more is the only option.
How long does installation take?
Rule of thumb for a trench system at 50 to 60 mm: an experienced two-person crew lays 150 to 250 m² per day, plus time for the finish. Prefab modular systems are faster and can convert a single room in a day, which suits phased work in occupied buildings.
Is a low-profile floor antistatic?
Generally not. Office-grade products carry no static-dissipative performance unless it is specifically ordered. Server rooms, IDF closets, and control rooms need a proper ESD raised floor; on mixed projects the two systems are specified and installed side by side.
What maintenance does it need?
Very little. The finish is maintained like any equivalent floor covering; the access floor itself needs occasional inspection of trench caps, an eye on any panel that starts to rock, and nothing else. There is no cavity to clean, no plenum to vacuum, which is one of its quiet advantages over conventional systems.
Huiya Real-Time News
Huiya Real-Time News is dedicated to providing you with the latest and most authoritative information on the raised flooring industry.
We provide 24/7 updates on industry policy interpretations, market trend analysis, company news.
MORE DOWNLOADS

GENERAL CATALOGUE
HUIYA INTRODUCTION

HUIYA GREEN LABEL

CAD/BIM FULL STEEL
APPLICATION SCENARIOS


