
A raised floor in your garage can provide many benefits. It helps protect your existing floor from oil stains and damage, provides a level surface for storage and workspaces, and creates a warmer area in a typically cold garage. Building a raised floor is a moderately difficult DIY project that can usually be completed over a weekend.
Step-By-Steap Guide To Install Raised Floor in Your Garage
Follow these steps to learn how to build a raised floor that fits your garage space and needs.
Step 1 – Choose the Height
The first step is deciding how high you want the raised floor to be. Typical heights are 4-6 inches, but you may want to go higher or lower. Factors to consider include:
- – Ceiling height – Make sure the raised floor does not reduce overhead clearance too much, especially for tall vehicles.
- – Ramp height – If building a ramp for vehicle access, higher floors mean you need a longer ramp.
- – Usage – Higher floors provide more space for insulation and utilities underneath. Lower floors are easier to walk and work on.
- – Floor levelness – More height allows correcting uneven spots in the existing floor.
For most garages, a 4 or 5 inch high floor provides a good compromise between these factors.
Step 2 – Choose the Flooring Material
You have several options when choosing the surface material for a raised garage floor:
- – Plywood: The most affordable option. Use at least 5/8” tongue and groove plywood for strength. Avoid thin, porous plywood prone to rotting.
- – OSB: Oriented strand board is moisture-resistant but rougher than plywood. Use 3/4” tongue and groove OSB panels.
- – lastic composite: Plastic lumber or composite boards made from recycled plastics offer high moisture resistance. Easier to clean than wood.
- – Concrete floor panels: Preformed interlocking concrete floor tiles create a very durable surface that’s easy to install. Costs more than other options.
- – Vinyl floor tiles: Interlocking vinyl garage floor tiles attach to each other for simple installation. Provides good moisture protection.
Plywood or OSB panels are good choices for most raised garage floors. Avoid particle board since it can swell and delaminate when exposed to moisture over time.
Step 3 – Plan the Layout
Measure your garage floor length and width. Sketch a layout for the raised floor panels to see how they will fit into the space. Arrange the panels so seams between sheets fall over the supporting joists, not between them. This provides stronger support under the seams.
For complex floor plans, draw a grid representing the joist layout. Indicate panel dimensions on the grid to optimize the layout. Having panels meet at the center of joists simplifies fastening.
Make sure to leave clearance at the edges for constructing ramps or steps. Allow space for utilities such as drains, conduits, and outlets as needed.
Step 4 – Purchase Supplies
Once you have a floor plan, calculate the materials needed. For a basic raised wood floor you will need:
- – Floor panels: Determine the square footage based on your plan. Buy 5-10% extra to allow for mistakes and cutting.
- – Joists: 2×4, 2×6, or 2×8 lumber joists spaced 16″ to 24″ on center. Match the joist height to the floor thickness.
- – Fasteners: 2 to 3 inch deck screws, 8d or 10d nails. Make sure they are rated for treated lumber if using treated joists.
- – Vapor barrier: 6 mil polyethylene sheeting to cover ground under the flooring.
- – Sill gasket: Closed cell foam to cushion joists resting on concrete.
- – Miscellaneous: Adhesive, fasteners, flashing, ramp/step materials.
Shop around for the best prices on quality lumber and decking materials. Avoid warped or damaged boards.
Step 5 – Prepare the Concrete Slab
Before installation, clean and prepare the existing garage floor slab:
- – Sweep up all dirt, debris, and standing water. Use degreaser to remove oil spots.
- – Grind down any high spots or protrusions that could make the floor uneven. Fill low areas with an leveling compound.
- – Repair major cracks and holes with concrete patch filler. Minor cracks can be ignored or sealed with caulk.
- – Etch the concrete with an acidic etcher to rough up the surface for better adhesion. Rinse well and allow to fully dry.
- – Apply a coating of epoxy primer over the slab. This seals the surface and prevents dusting. Allow curing completely per instructions.
Proper prep prevents moisture from seeping under the raised floor over time. Check for standing water or hydrostatic pressure that may need addressing first.
Step 6 – Layout and Install Vapor Barrier
Once the slab is prepped, roll out 6 mil polyethylene sheeting over the entire floor. Overlap seams by 12 inches and seal with adhesive or tuck tape. The sheeting prevents ground moisture from passing through the slab and into the wood over time.
Tape down any edges and seams so the barrier stays in place once the floor joists are installed on top. Avoid walking directly on the plastic sheeting to prevent damage.
Step 7 – Cut and Place Perimeter Boards
Begin actual floor installation by cutting 2×4 or 2×6 boards to length for the perimeter. Match the perimeter board height to the flooring thickness. For example, use 2x4s with a 4 inch raised floor.
Place the perimeter boards end-to-end around the edges. Leave a 1/4 inch gap at corners for expansion. Fasten into the concrete slab every 18-24 inches with concrete anchors or masonry screws. The top of the boards should be level with your desired finished floor height.
Step 8 – Cut and Install Joists
Measure and mark joist positions on the perimeter boards per your plan. Joists typically run perpendicular to the garage door opening.
Cut 2×4, 2×6, or 2×8 joists to length. Place joist sill gasket under one end of each joist to prevent moisture wicking. Fasten joists to the perimeter boards with deck screws or 16d nails.
Measure diagonally across opposite corners periodically to check for squareness as you install joists. Add blocking between joists as needed near ramps or heavily loaded areas for reinforcement.
Step 9 – Add Insulation (Optional)
If you want a warmer, insulated floor, this is the best time to add insulation between the joists. Cut rigid foam insulation panels to fit snugly between the joists. Secure with dabs of adhesive so they don’t shift.
Alternatively, lay fiberglass batt insulation across the joists, securing it with wires. The insulation increases heating efficiency and reduces cold transfer from the slab.
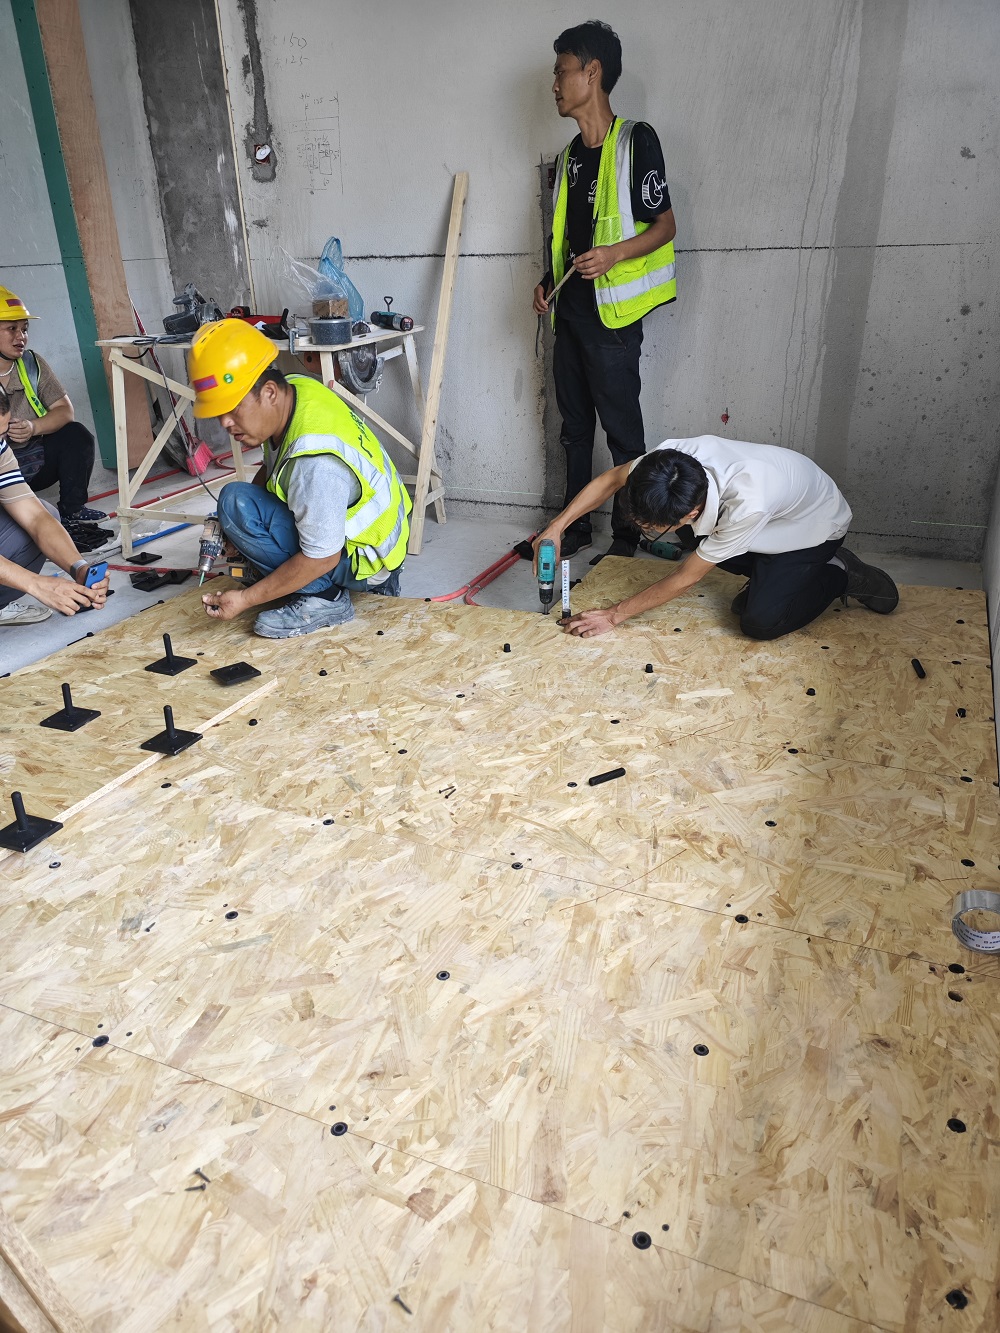
Step 10 – Install Floor Decking
With the joists in place, start fastening floor panels at one corner, positioning the grooved edge against the perimeter. Use 2-3 inch deck screws placed 6-8 inches apart. Stagger panels so seams hit different joists.
Leave a 1/8 inch gap between panels and walls for expansion. If needed, cut panels with a circular saw to fit irregular spaces. Complete each row, making sure panels are flush and level with adjacent ones.
Use 8d or 10d nails if fastening with a nail gun instead of screws. Drill pilot holes near panel edges to prevent splitting. Work slowly and safely when installing flooring overhead or at heights.
Step 11 – Complete Ramps and Access Points
Once the main floor is installed, construct any ramps or steps needed for vehicle and pedestrian access. Typically a slope of 15% or less is recommended for vehicle ramps. Stair steps should have even 7-8 inch riser heights and 9-10 inch tread depth.
Use treated lumber and exterior construction adhesive to attach ramps, stairs, or perimeter boards around openings. Consider adding grip tape, reflectors, or high visibility paint to improve safety on ramps. Add trim boards along exposed edges for a finished look.
Let the floor sit overnight before using so the adhesive fully cures. Sweep up debris and vacuum dust before moving items in. For more vibration absorption, you can add foam mats or rubber tiles on top of wood panels.
Optional protective coatings like epoxy paints or polyurethanes can help seal and protect the surface. But leave coatings out of the budget for an initial raised floor project. The floor panels can always be refinished later if needed.
Building a raised floor yourself takes some effort, but provides a durable and useful space for garage storage, parking, and activities. Maintain the floor by promptly cleaning spills, recoating high wear areas, and checking for damage or loose boards. With periodic upkeep your raised floor can last for many years.
Huiya Real-Time News
Huiya Real-Time News is dedicated to providing you with the latest and most authoritative information on the raised flooring industry.
We provide 24/7 updates on industry policy interpretations, market trend analysis, company news.

匯亜総経理、常州市文化交流協会の日本視察団に参加|匠の文化と経営の道を学ぶ

匯亜OAフロア、日本・福伸電機を訪問 -リーン生産方式と企業経営のノウハウを深く学ぶ
湖州にて日本式二重床システムの現地調査:商業用フリーアクセスフロアから住宅市場への新たな機会 | 汇亚
HUIYA社、JIS A 1450試験装置を完成させ、日本のOAフロア市場向け日本規格への適合を実現
MORE DOWNLOADS

GENERAL CATALOGUE

HUIYA INTRODUCTION

HUIYA GREEN LABEL
CAD/BIM FULL STEEL
APPLICATION SCENARIOS


