
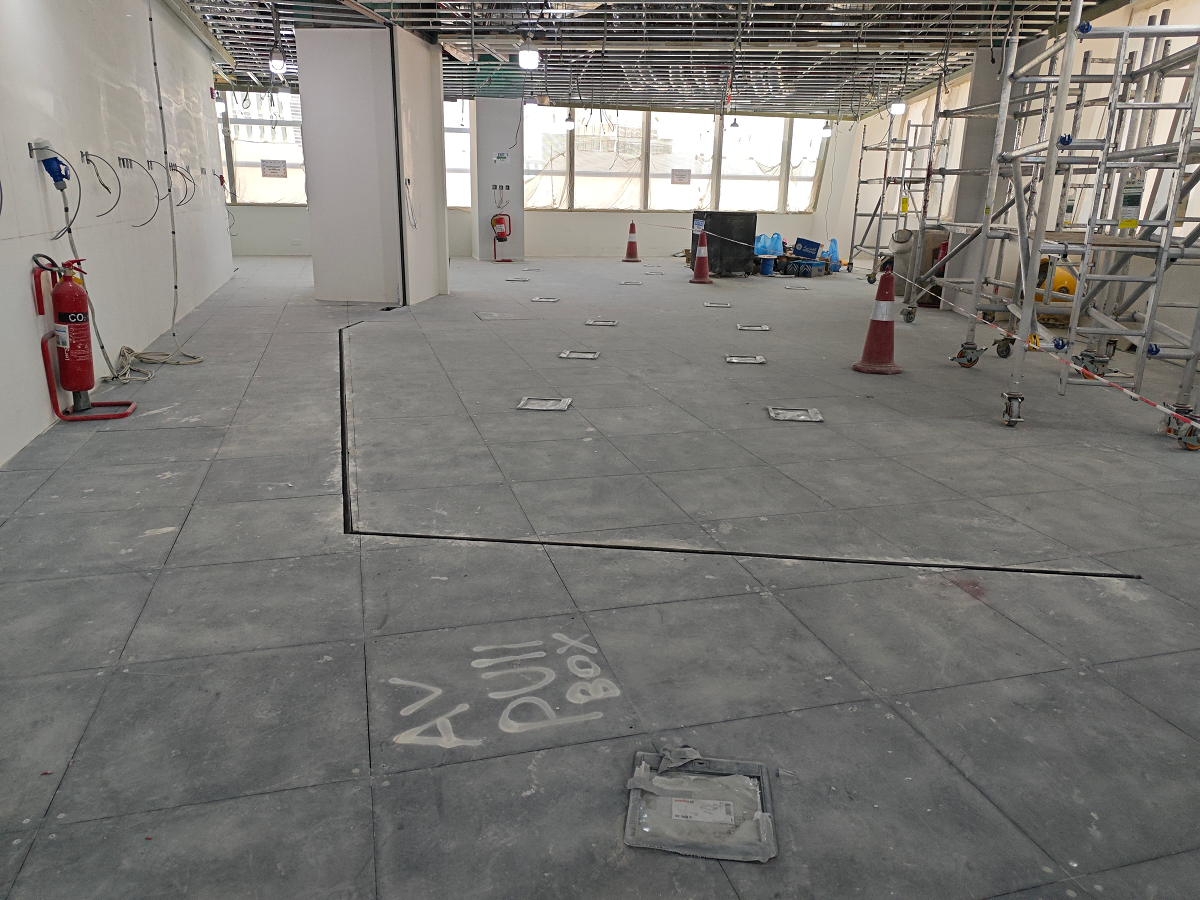
A raised floor system in a basement can be an excellent solution for various issues, including dampness, uneven surfaces, and the need for running utilities like electrical, plumbing, and HVAC systems beneath the floor. Here’s a detailed guide on implementing a raised floor in your basement, including its benefits, best flooring tiles and finishes, and installation steps.
Raised Floor For Basement – Benefits, Best Tiles, Installation
Finishing a basement is a great way to add much-needed living space to your home. However, basements can often have persistent moisture issues that make traditional flooring installations challenging. If you’ve struggled with a damp or wet basement floor, a raised floor system may be the ideal solution.
Why Install Raised Access Flooring in the Basement?
Here are the benefits of installing raised access flooring in your basement:
- Moisture Control: Helps in managing moisture levels in basements prone to dampness or flooding by providing an air gap that aids in ventilation and drying out.
- Utility Access: Facilitates easy access to electrical wiring, plumbing, and HVAC systems, which can be run beneath the floor panels and accessed as needed for repairs or upgrades.
- Thermal Insulation: Provides an additional layer of insulation, helping to keep the basement warmer in the winter and cooler in the summer.
- Flexibility in Flooring Options: Allows for a variety of flooring options on top of the raised floor, such as carpet, laminate, or tile.
What are the Best Raised Floor Tiles for Basement?
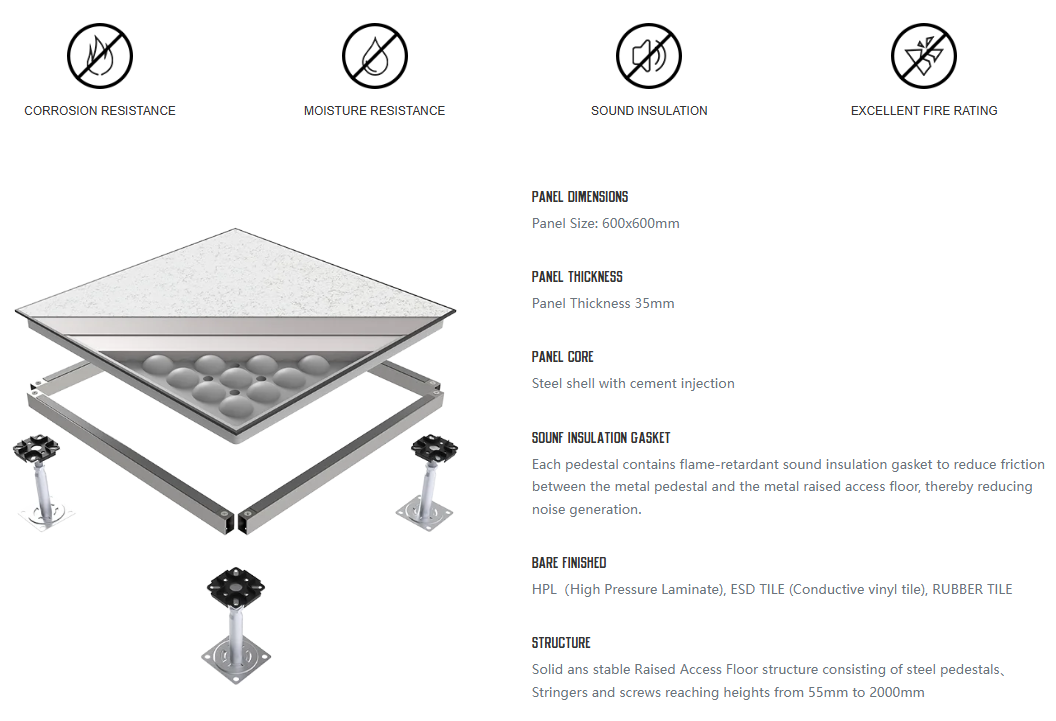
When choosing raised access floor panels for a basement, it’s essential to consider factors such as moisture resistance, durability, load capacity, and ease of installation. Here are some common types of raised floor panels suitable for basement environments and their respective features:
1. Concrete Panels
- Durability: Concrete panels are extremely durable and resistant to wear and tear.
- Moisture Resistance: They provide excellent resistance to moisture, which is crucial in basement environments.
- Weight: These panels are quite heavy, which can be a drawback in terms of installation and load on the building structure.
- Thermal Mass: Concrete has good thermal mass, helping to regulate the temperature in the basement.
2. Wood Core Panels
- Cost-Effective: Generally less expensive than concrete or metal options.
- Lightweight: Easier to handle and install compared to concrete panels.
- Insulation: Wood has natural insulating properties, which can help to keep the basement warm.
- Moisture Consideration: Wood core panels should be treated for moisture resistance or chosen with a composite that is designed to resist humidity and mold.
3. Composite Panels
- Material Variety: Often made from a combination of materials such as wood, plastics, and resins.
- Moisture Resistance: Typically engineered to be moisture resistant, which is ideal for basements.
- Lightweight: Easier to install than concrete panels and often more durable than wood.
4. Metal Panels
- High Load Capacity: Metal panels are strong and can support significant loads, which is beneficial for basements used as functional spaces.
- Moisture and Fire Resistance: They offer excellent resistance to moisture and are not susceptible to fire.
- Durability: Highly durable and resistant to damage.
- Cost: Generally more expensive than wood or composite panels.
5. Aluminum Panels
- Corrosion Resistance: Aluminum naturally resists corrosion, making it suitable for damp environments.
- Lightweight: Easier to install and handle.
- Durable: Offers a good balance of durability and weight.
Concrete and composite panels are generally the most robust choices for basements due to their durability and resistance to moisture. Wood core panels can also be suitable if they are treated for moisture resistance. Metal panels, while more costly, offer excellent longevity and load-bearing capabilities.
Before making a final decision, evaluate the specific needs of your basement, including budget, intended use, and local climate conditions. If in doubt, consulting with a flooring specialist or contractor who has experience with basement renovations can provide valuable insights tailored to your situation.
What are the Best Raised Flooring Finishes for Basement?
When selecting a surface finish for raised flooring in a basement, it’s important to choose materials that can handle potential moisture, are durable, and fit the intended use of the space. Here are some of the best options for surface finishes suitable for raised floors in basements:
1. Vinyl Flooring
- Water Resistance: Vinyl is highly resistant to water, making it ideal for potentially damp environments like basements.
- Durability: Modern vinyl flooring is durable and can withstand heavy foot traffic.
- Variety: Available in tiles, planks, or sheets and comes in a wide range of designs, including options that mimic wood or stone.
- Ease of Installation: Vinyl can be easily installed over a raised floor, and it typically comes with click-lock or adhesive backing options.
2. Ceramic or Porcelain Tile
- Moisture Resistance: Both ceramic and porcelain tiles are excellent for moisture-prone areas.
- Durability: These tiles are very durable and can handle heavy use, making them suitable for a basement that sees a lot of activity.
- Aesthetic Variety: Tiles come in various colors, patterns, and sizes, allowing for flexible design options.
- Maintenance: Easy to clean and maintain, though grout lines may require periodic sealing to prevent moisture absorption.
3. Engineered Wood Flooring
- Moisture Tolerance: More resistant to moisture and humidity changes than solid hardwood, making it more suitable for basements.
- Natural Look: Offers the beauty of real wood without the expansion and contraction issues associated with solid hardwood.
- Installation: Typically designed with a click-lock system that makes installation straightforward over a raised floor.
4. Laminate Flooring
- Cost-Effective: Generally less expensive than real wood or tiles but still offers a visually appealing finish.
- Moisture-Resistant Options: Modern laminate flooring often includes moisture-resistant properties, but always check the specific product ratings for basement suitability.
- Durability: Good for high-traffic areas, although it can be susceptible to damage if water is allowed to sit on the surface for extended periods.
5. Carpet Tiles
- Comfort: Adds warmth and comfort to a basement, making it feel more like a living space.
- Flexibility: Damaged tiles can be easily replaced without having to redo the entire floor.
- Variety: Available in various textures, colors, and styles.
- Moisture Considerations: Opt for carpet tiles specifically designed for basements or those with moisture-resistant backing.
6. Rubber Flooring
- Durability: Highly durable and resistant to water and stains, rubber flooring is ideal for home gyms or play areas in basements.
- Comfort: Provides cushioning and reduces noise, which can be beneficial in a basement setting.
- Ease of Maintenance: Simple to clean and maintain.
Choosing the right flooring finish will depend largely on your budget, the climate, the expected traffic, and the intended use of the basement. Each type of flooring offers distinct advantages, so consider what attributes are most important for your specific needs.
How To Install Raised Floor In Basement?
Installing a raised floor in your basement is a project that can greatly improve the functionality, comfort, and safety of the space. It’s particularly useful for managing moisture, providing a flat and stable surface, and facilitating the installation of utilities such as electrical, plumbing, and HVAC systems. Here’s a step-by-step guide on how to install a raised floor in your basement:
1. Materials and Tools Needed
- Raised floor panels (often modular)
- Pedestals (adjustable for leveling)
- Moisture barrier or vapor barrier
- Screws and fasteners
- Drill
- Level
- Tape measure
- Circular saw (for cutting panels if necessary)
- Sealant (for waterproofing)
2. Preparation
- Step 1 – Clean and Prepare the Basement Floor: Remove any debris, furniture, and existing flooring. Ensure the floor is dry and repair any cracks or damage in the concrete.
- Step 2 – Measure the Area: Measure the basement area to calculate how many panels and pedestals you will need. Plan the layout of the panels, ideally starting from the center of the room to ensure an even installation.
- Step 3 – Moisture Barrier Installation: Roll out the moisture barrier over the entire floor to prevent any ground moisture from affecting the raised floor. Overlap the edges of the moisture barrier by at least 6 inches and seal them with waterproof tape.
3. Installation
- Step 1 – Install the Pedestals: Place the pedestals at the designated spots according to the panel size. The typical spacing is determined by the size and type of panels and the load requirements. Use a laser level or a traditional level to adjust each pedestal to ensure they are all at the same height, providing a level surface for the panels.
- Step 2 – Laying the Panels: Start laying the panels on the installed and leveled pedestals. Begin from one corner of the room and work your way out. Secure each panel to the pedestals with screws, ensuring they are firmly attached and do not shift. If necessary, cut any panels to fit using a circular saw, ensuring to measure and mark accurately before cutting.
- Step 3 – Sealing and Finishing: Apply sealant along the edges of the room and between any panels where gaps might exist to prevent moisture ingress and to ensure airtightness. Check the entire floor to ensure it is stable and secure.
- Step 4 – Install Final Flooring: Once the raised floor is installed, you can add a top layer of flooring such as carpet, laminate, vinyl, or tiles, depending on your preference and the intended use of the basement. Follow the specific installation guidelines for the flooring type you choose.
- Step 5 – Run Utilities: If needed, run electrical wiring, plumbing, and HVAC beneath the raised floor before installing the final floor covering. Ensure that access panels or removable sections are incorporated for future maintenance.
- Step 6 – Inspect and Test: Walk over the floor to test its stability and check for any movement or squeaking. Make any necessary adjustments to pedestals or panels.
Installing a raised floor can be a DIY project, but it requires careful planning and execution. If the project involves complex utility installations or if you are unsure about any steps, consider hiring a professional to ensure the job is done safely and correctly.
More Considerations for Installing Raised Access Floors in Wet Basements
Now you may have the idea of installing a raised floor system in your basement, but before doing so, you need to consider the following factors:
- Moisture Barrier: Regardless of the panel type, always use a vapor barrier underneath the raised floor to protect against moisture coming up from the concrete slab.
- Maintenance: Consider how easy it is to access and maintain the space under the raised floor, especially for running utilities like electrical wiring and plumbing.
- Weight Load: Ensure the raised floor system and materials chosen can support the intended load, especially if you plan to place heavy furniture or appliances on top.
- Building Codes and Permits: Check with local building authorities to ensure compliance with codes and whether permits are required for this type of installation.
- Professional Help: For complex installations, especially those involving significant leveling, insulation, or utility integration, consider hiring a professional.
Implementing a raised floor in a basement can significantly improve its usability, comfort, and functionality. By following these steps and considerations, you can enhance your basement effectively and safely.
Huiya Real-Time News
Huiya Real-Time News is dedicated to providing you with the latest and most authoritative information on the raised flooring industry.
We provide 24/7 updates on industry policy interpretations, market trend analysis, company news.


MORE DOWNLOADS

GENERAL CATALOGUE
HUIYA INTRODUCTION

HUIYA GREEN LABEL

CAD/BIM FULL STEEL
APPLICATION SCENARIOS


